This post is also available in: Español
Five Photography Tips for Better Etsy Photos
E-Commerce is a visual experience, so great photos that help customers make confident purchase decisions are essential. Not every Etsy seller is an expert photographer, though.
Knowing what to do beyond just pointing your camera at a product might not always be obvious.
To help you get on the right track, we’ve gathered five practical photography tips you can apply to your Etsy product photography today. These Etsy photo tips are perfect if you’re just starting out. Applying these strategies may help you increase sales in your shop, and maybe even take better family photos as well!
Tip 1: Place Your Etsy Product Front and Center
In general photography, the Rule of Thirds is often applied. Imagine a 3×3 grid over your image and place the product near one of the intersection points (slightly off-center).
For Etsy listing photos, though, clarity matters more. Since shoppers “skim” listings as they browse, a clean, centered product shot usually works best. This simple adjustment is one of the easiest Etsy photo tips for improving your listings’ main images. We can still use the Rule of Thirds in other shots.
For example, if you are photographing your product on an end table, you may want to place it off to the side of the shot rather than in the center to make the photo feel more natural. However, for your listings’ main images, it’s best to keep the item large, centered, and easy to view. Remember, the goal is to give your shoppers as much visual information as possible at a glance.
Make your listings’ main images the most eye-catching photos that you took. Etsy uses your first product photo as the thumbnail shoppers see in search results, so choose a clear, professional-looking image that shows exactly what you’re selling. For subsequent photos, include your product from different angles. This way, shoppers can see the entire product.
Also, don’t stop at one image. Etsy allows up to 20 photos per listing, and using all 20 spaces can help answer potential questions customers may have about the item. Using all 20 spaces also improves conversions because each additional image adds more information.
Tip 2: The Best Camera is the One You Have
With so many camera options out there, it’s hard to figure out what you need if you don’t have experience with photography. Having an expensive camera is nice, but your smartphone is already capable of professional-looking results. For more on this topic, check out this post over on eRank’s blog.
It’s important not to focus so much on the gear, and instead focus on what you can control, like camera stability (use a tripod or stack of books to prop up your phone), your photos’ composition, and lighting. Most Etsy photo tips don’t require special equipment. Consistency and good lighting matter far more than the price of your camera.
All this to say, don’t feel like you have to have expensive photography equipment to get started. Grab whatever camera you have (even if it’s your phone’s), start shooting, and refine your strategy over time as your skills and setup improve.
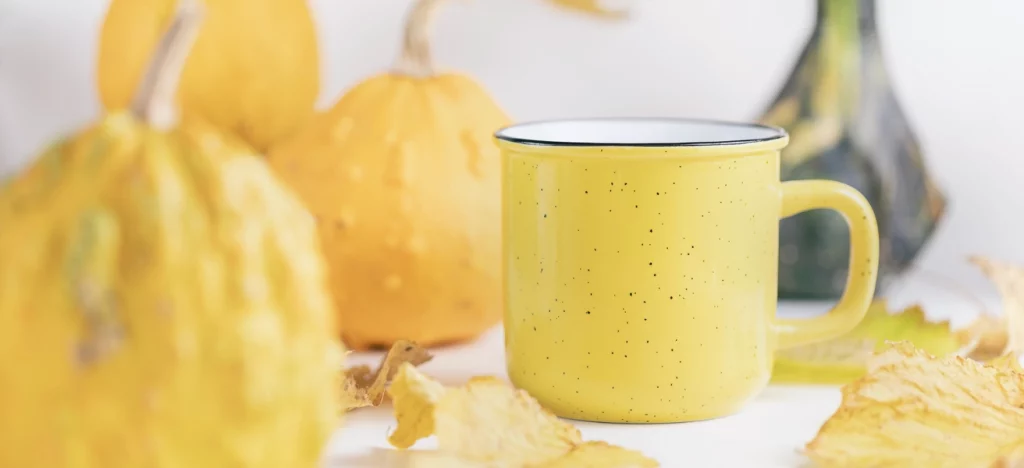
Tip 3: Master Your Product Lighting for Better Etsy Photos
Quality lighting can make a huge difference in image quality. There are a few things to consider when determining the best lighting for your products’ photos. You can work with the available light in the room, but this is rarely ideal. The next option is to work with natural light. If you can get your product near a window where the natural light is soft and indirect, you may be able to get some decent shots of your product.
The last option is to work with a dedicated light. This will let you have complete control over the lighting in your photo. Ideally, you will want two sources of light so that you can light your item from two sides, but one simple hack to get around that is to use a sheet of paper or poster board opposite your light source, which will allow you to bounce light back at your item (a simple reflector helps, too).
One other item to consider is a lightbox, great for a white background and clean and bright product images. These small tents are made from a white fabric that allows light to come through softly and illuminate your subject evenly. These are great to have if your photo location has harsh lighting that you can’t control.
Make sure to avoid mixed color temperatures (e.g., using a warm lamp next to a cool window), watch for hard shadows, and keep reflective products angled to avoid glare. Good lighting is one of the most effective ways to improve Etsy listing photos without advanced skills.
Tip 4: Plan for Consistency Between Your Etsy Listing Photos
One thing that brings cohesiveness to an Etsy store is consistent imagery. The goal here is to make your photos feel like a complete set rather than a group of individual photos. There are several things you can do to bring a sense of “togetherness” to your photos.
Try using the same color palette for the background of each image. Common color themes are one of the simplest ways to create a common look among your photos.
Another way to keep your branding consistent in your products’ photos is to apply a similar editing style to each photo. If you decide to apply a specific editing technique to one, try it with the others as well to keep the theme going.
Technical consistency matters, too. Etsy recommends taking high-resolution product images (2000px or more) and using the sRGB color profile so your images’ colors display correctly. Aim for at least 2000px on the shortest side so images stay crisp and support zoom.
Consistent quality across images is one of the most important best practices for Etsy listing photos.
Tip 5: Leave Some Room at the Edges (Etsy Thumbnail Tips)
Etsy may show your listings’ main images in different aspect ratios depending on page, device, and browser. In most cases, Etsy recommends using landscape or square images. However, the platform recently started testing portrait format across some devices. This means that your listings’ main images might be cropped differently than expected, especially if the product sits too close to the edges.
To keep things future-proof, use a clean, centered photo with plenty of space around your product. This way, the thumbnail still looks clear whether it appears as a 1:1 square, a 4:3 landscape, or a 3:4 vertical. A landscape (4:3) image is often the easiest to control. Regardless of which format you choose, leaving extra space around your products in their photos prevents important details from being cut off.
Because many sellers have recently noticed unexpected cropping on their previews, we created a visual guide to help you understand exactly how Etsy may display your thumbnails across different layouts. You can find the full guide here.
For more information on best practices, check out this article in Etsy’s Help Center.
Bonus: Use eRank’s Create Video Tool to Add a Short Etsy Listing Video
A 3-15 second product video can quickly answer questions that photos can’t (especially questions about how an item handles when in use). Etsy supports one video per listing. These videos are silent (no audio) and can be up to 100MB. Common formats like MP4 and MOV are accepted. Aim for at least 1080px for a crisp result.
Videos can take a while to record, so if you’re short on time, eRank’s Create Video Tool helps you generate simple, shop-ready listing videos for your Etsy products. It’s a fast way to improve clarity in your listing and complement your Etsy photos.
Bring It All Together: Etsy Photo Tips and Best Practices
Now that you have a fresh perspective on photos for your Etsy shop, it’s time to get to work. Remember to consider things like composition, lighting, and consistency between shots to create a set of product photos that feel cohesive.
If you’re unsure how an image will appear in Etsy search results, use the thumbnail preview and leave a bit of extra space around your product so you can adjust the crop if needed.
Lastly, don’t sweat over the camera you have. Make the most of what’s available and improve over time with these tips and tricks.
Before you publish, here’s a quick checklist:
- Make sure that your listings’ main images clearly show what’s for sale with no distractions in the foreground or background
- For each listing’s main image, upload alandscape or square image that has a 4:3 framing and border for safe cropping
- Use each of your listings’ photo spaces to answer common questions. Etsy now allows up to 20 images, so you can add as many as you need to show your product clearly and address frequently asked questions
- Ensure that your listings’ images are high-resolution (+2000px) and in sRGB for accurate color and zoom
- Add a short video to each listing to show the item in action
Want to see all your Etsy photos in one place while optimizing your listings? Check out eRank’s Listing Audit tool to spot potential image issues fast.